
This tutorial walks through migrating saved objects from a multi-tenant OpenSearch Service domain into OpenSearch UI workspaces.
Migrate from OpenSearch (Multi-tenant)
When to use this guide
Use this guide if your data source is an OpenSearch Service domain with:
- The Security Plugin enabled (shown as a badge in the migration dialog)
- Multiple tenants — typically
global_tenantplus custom tenants (e.g.,tenant 1,tenant 2,tenant 3)
Multi-tenant domains were used in OpenSearch Dashboards to give different teams or roles their own isolated set of dashboards. In OpenSearch UI, workspaces serve the same purpose — so the migration tool asks you how to map tenants to workspaces.
Prerequisites
- An OpenSearch Service domain with multiple tenants added as an Associated data source
- The domain has the Security Plugin enabled with multi-tenancy configured
Step 1: Open the migration dialog
Navigate to the Migrate to OpenSearch UI page and click the Migrate button.
Step 2: Select your multi-tenant domain
From the dropdown, select your domain. The dialog expands showing all tenants and their item counts.
What to notice:
- "Security Plugin" badge — confirms multi-tenancy is active
- Tenant count and items — "4 tenants • 56 items" summarizes what will be migrated
- Tenant table — each tenant listed with its item count (clickable to preview objects) and description
Step 3: Choose how to translate tenants into workspaces
Below the tenant table, the dialog asks: "How do you want to translate your tenants into Workspace?"
You have two options:
Option A: All in one workspace
Select "All in one workspace" — everyone shares the same space. All saved objects from all tenants are consolidated into a single workspace.
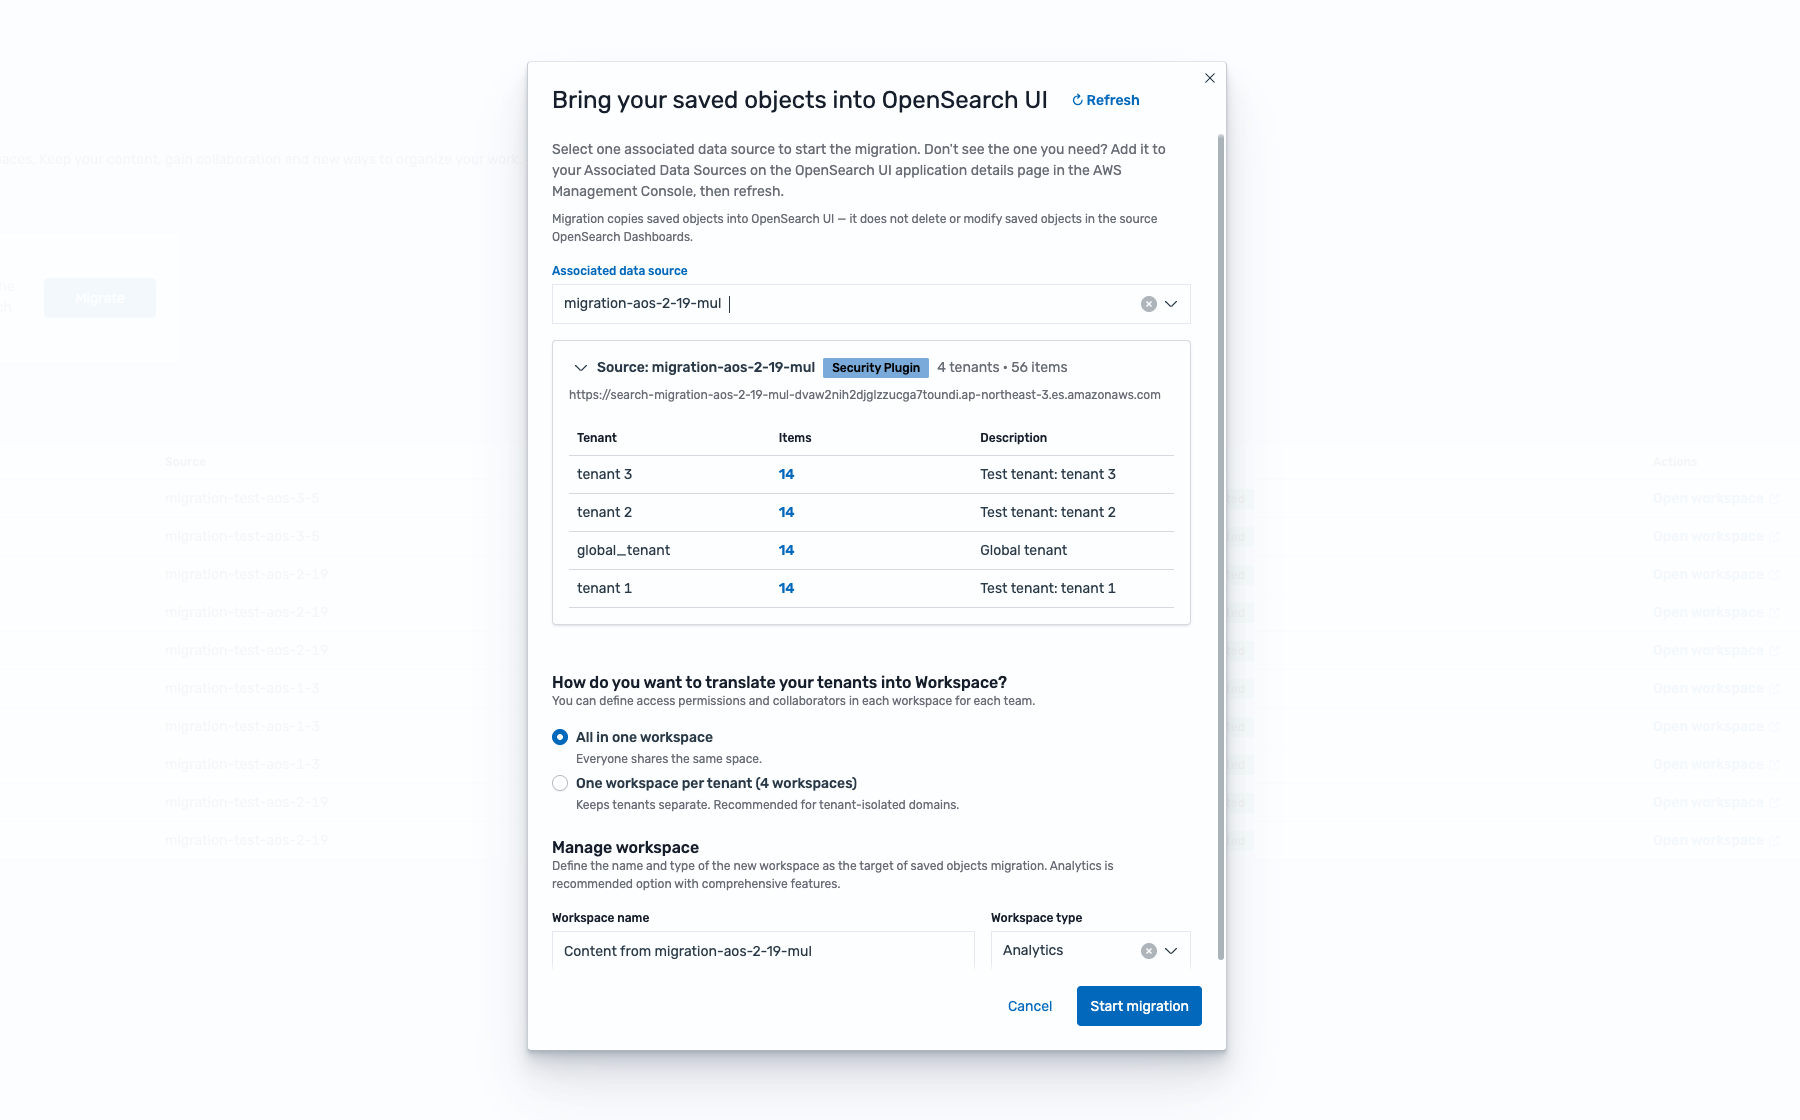
Best when: Your team is small, tenants were used casually, or you want a unified view of all content.
The dialog shows a single workspace name field (e.g., "Content from migration-aos-2-19-mul").
Option B: One workspace per tenant
Select "One workspace per tenant (4 workspaces)" — keeps tenants separate. Recommended for tenant-isolated domains.
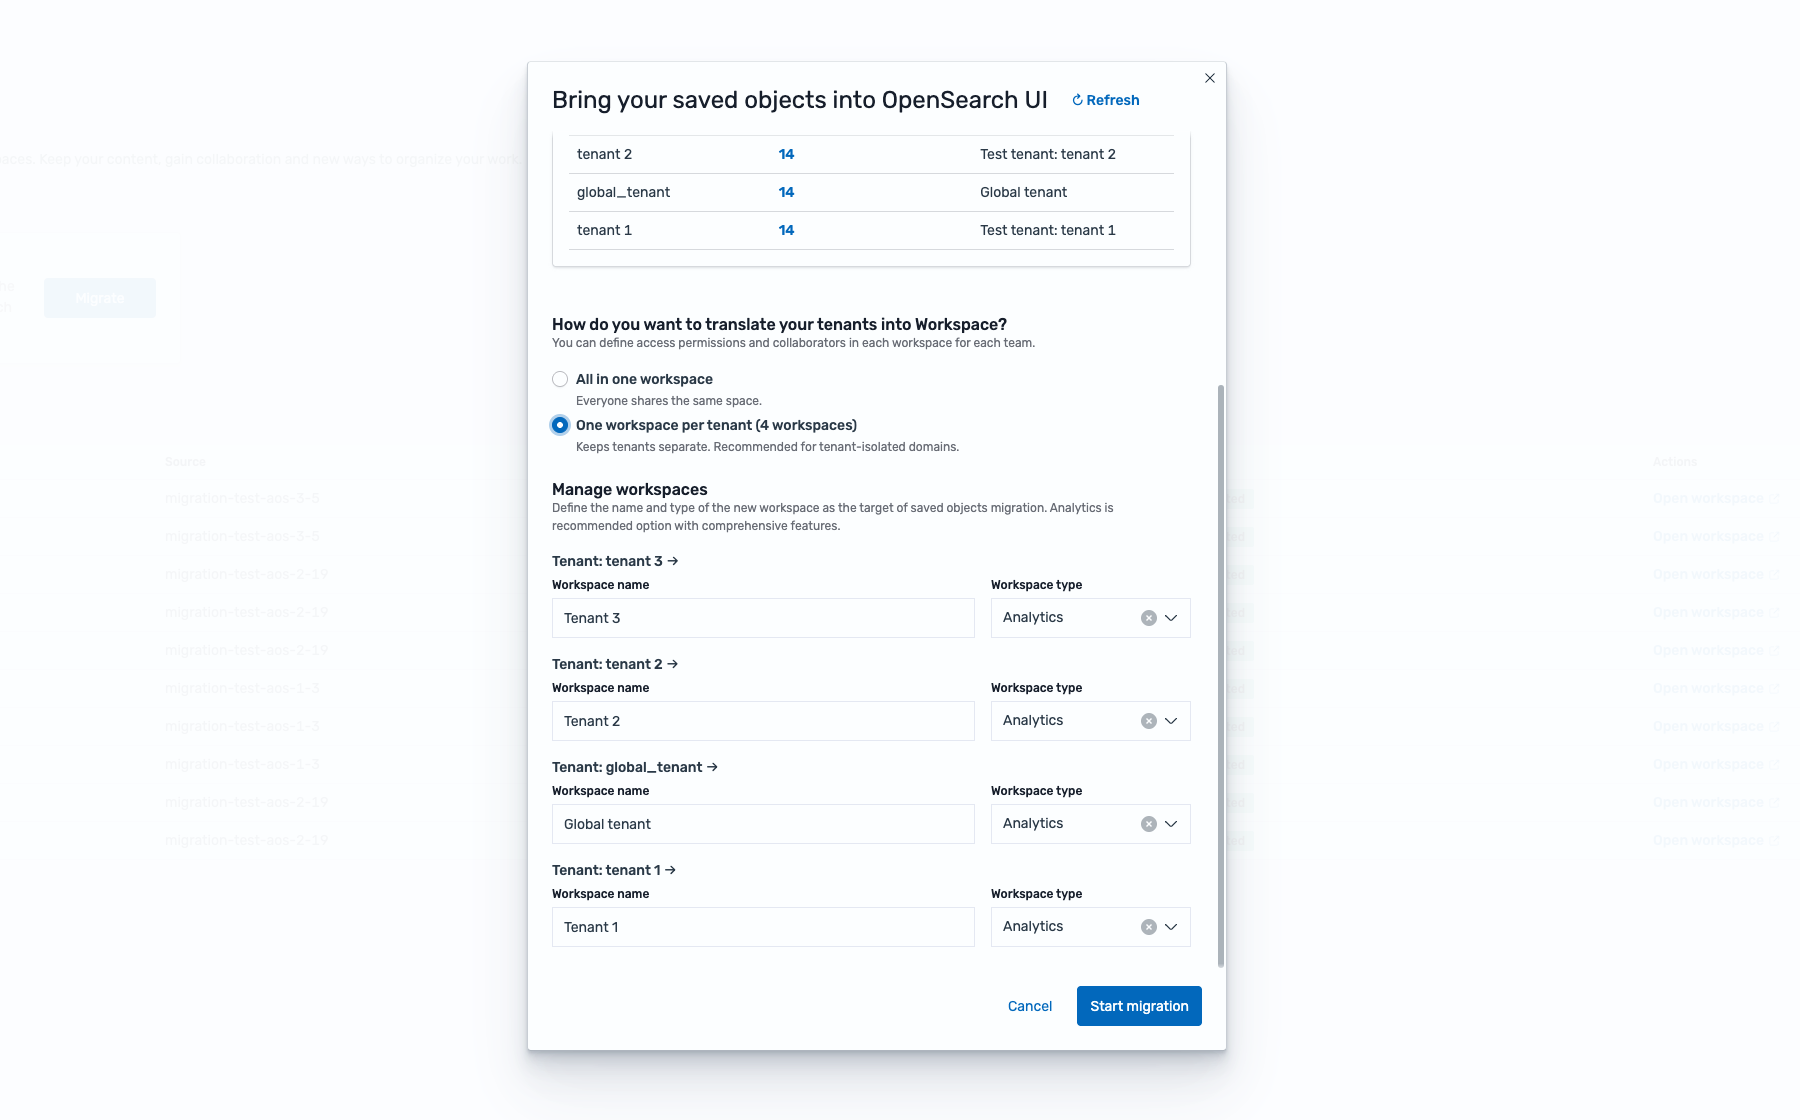
Best when: Teams had distinct tenants for isolation and you want to preserve that separation in OpenSearch UI.
The dialog expands to show a workspace name and type for each tenant:
- Tenant: tenant 3 → Workspace name: "Tenant 3"
- Tenant: tenant 2 → Workspace name: "Tenant 2"
- Tenant: global_tenant → Workspace name: "Global tenant"
- Tenant: tenant 1 → Workspace name: "Tenant 1"
You can customize each workspace name before migrating. Each workspace's type defaults to "Analytics" (editable).
Step 4: Start the migration
Click Start migration. Depending on your choice:
- All in one — creates one workspace with all tenants' objects merged
- Per tenant — creates separate workspaces, one per tenant
Step 5: Verify
Navigate back to the migration page. The Recent migrations table shows your completed migration(s).
What's next
- Open each workspace and verify dashboards render correctly
- If you chose "All in one," review for duplicate-named objects across former tenants
- If you chose "Per tenant," set workspace permissions to match the access patterns your tenants previously had
- Use Rerun Migration to sync updates if the source changes later