
This tutorial walks through migrating saved objects from an OpenSearch Serverless collection into an OpenSearch UI workspace.
Migrate from Collection
When to use this guide
Use this guide if your data source is an OpenSearch Serverless collection. Collections:
- Have a single tenant (
global_tenant) — all saved objects live in one place - Do not use the Security Plugin — no multi-tenancy to consider
- Result in a straightforward one-to-one mapping: one collection → one workspace
If your source is a managed OpenSearch Service domain (with Security Plugin), see Migrate from OpenSearch or Migrate from OpenSearch (Multi-tenant) instead.
Prerequisites
- A collection added as an Associated data source in your OpenSearch UI application
- The collection contains saved objects (dashboards, visualizations, index patterns, etc.)
Step 1: Open the migration page
Navigate to the Migrate to OpenSearch UI page from Data Administration, or click Migrate dashboards from data sources on the home page.
Step 2: Open the migration dialog
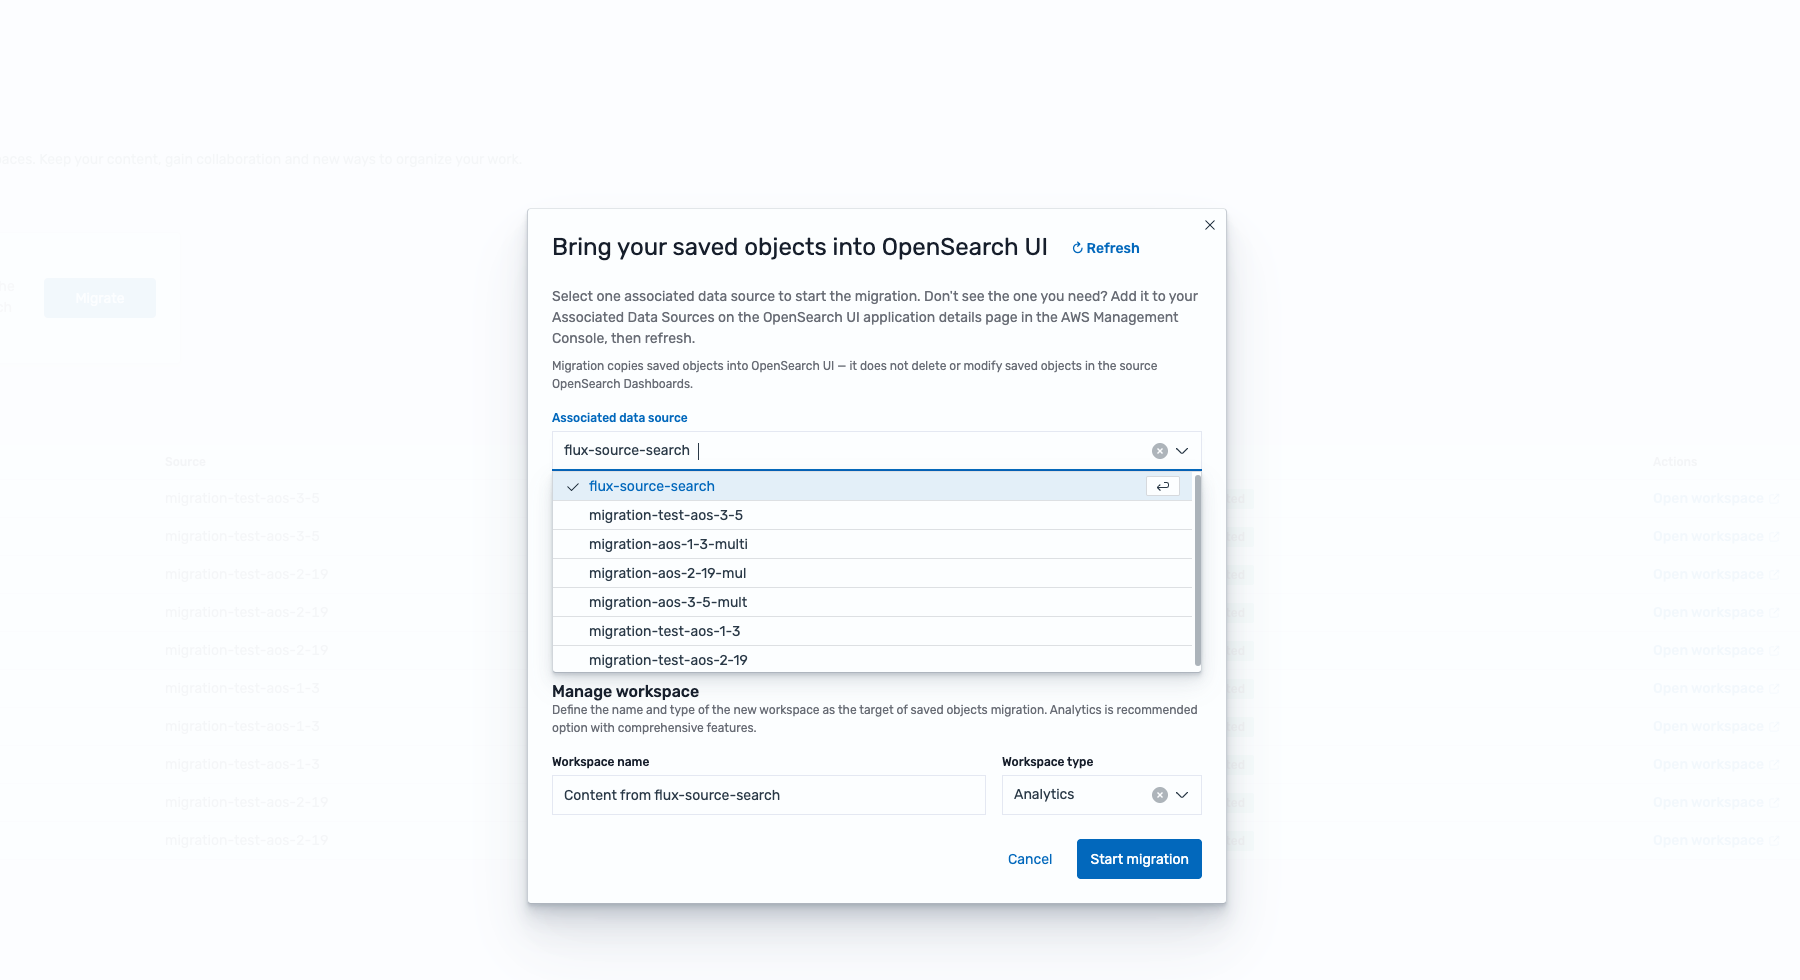
Click the Migrate button. A modal dialog opens titled "Bring your saved objects into OpenSearch UI" with a data source dropdown.
Step 3: Select your collection
From the Associated data source dropdown, search for and select your collection.
The dialog expands to show source details:
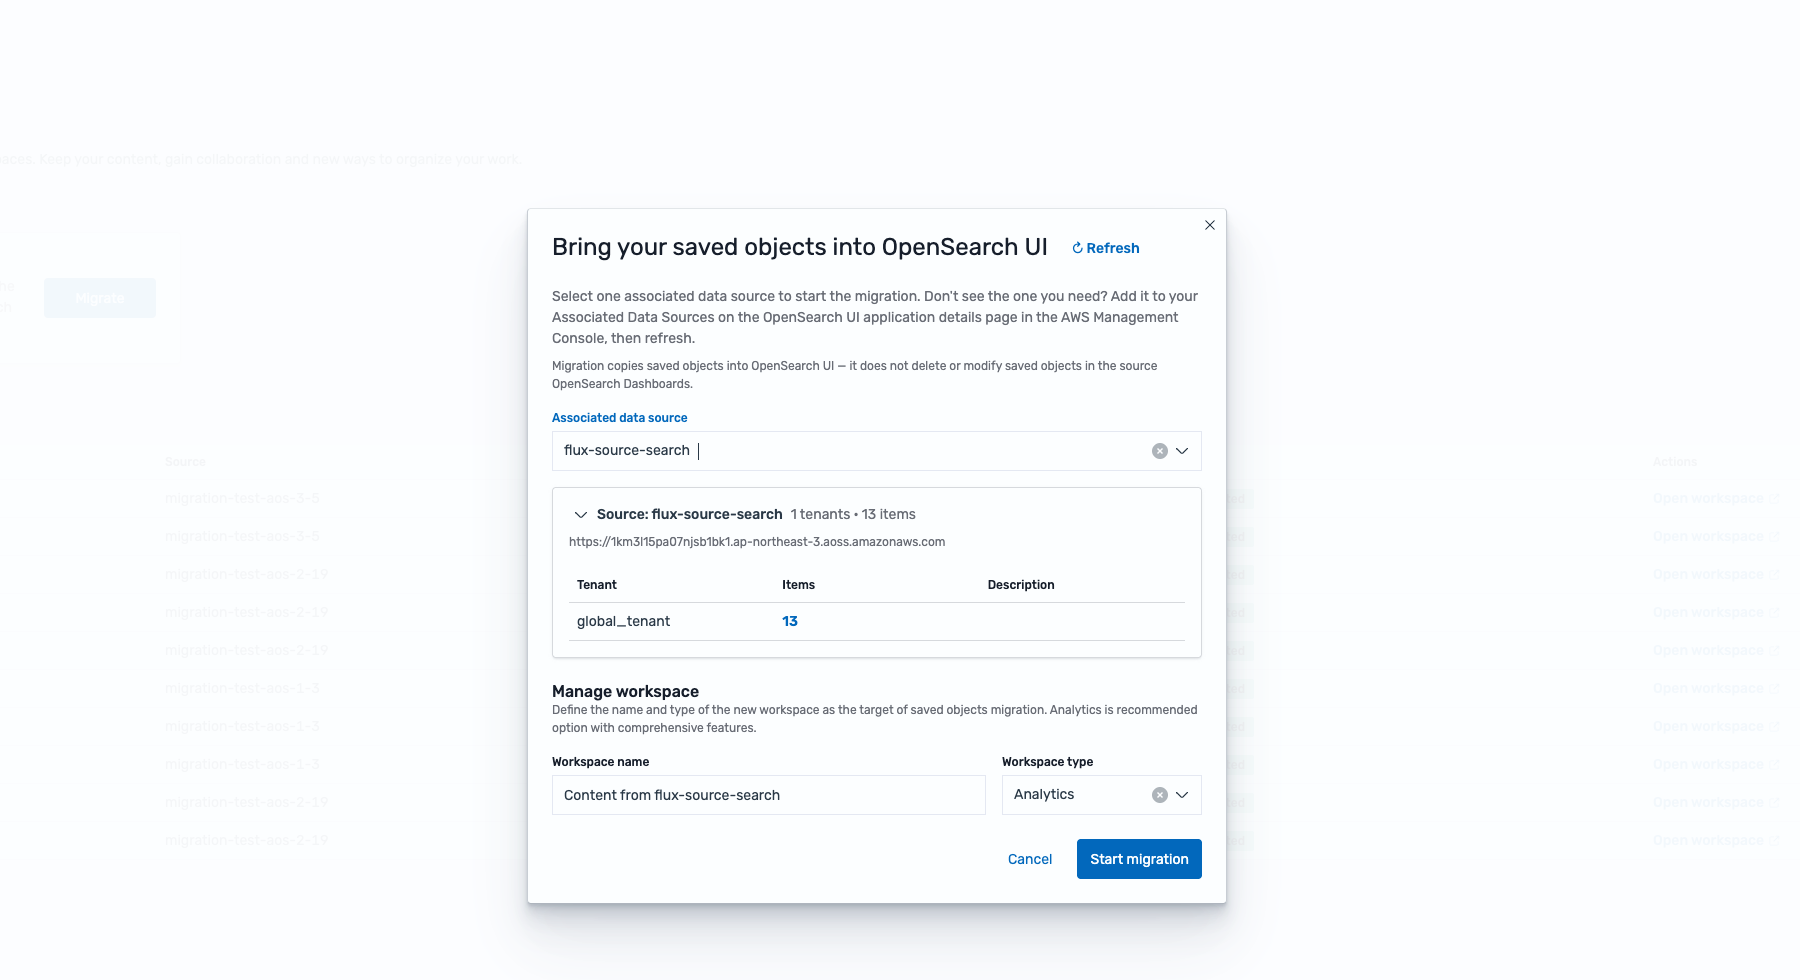
What to notice:
- No "Security Plugin" badge — this confirms the source is a serverless collection, not a managed domain. Compare with the Migrate from OpenSearch tutorial where the badge appears.
- "1 tenants • 13 items" — single tenant (
global_tenant) with all your saved objects in one place - Source endpoint — the collection URL (
.aoss.amazonaws.com) - Workspace name — pre-filled as "Content from [source-name]" (editable)
- Workspace type — defaults to "Analytics" (recommended for most use cases)
Step 4: Start the migration
Review the workspace name, then click Start migration. The migration runs server-side — you'll be redirected to the newly created workspace once complete.
Your workspace now contains all saved objects from the collection, linked to the correct data source.
Step 5: Verify in Recent migrations
Navigate back to the migration page. The Recent migrations table shows your completed migration with a direct link to open the workspace.
What's next
- Verify your dashboards render correctly in the new workspace
- Confirm index patterns point to the right data source
- If saved objects change in the collection later, use Rerun Migration to sync updates into the same workspace